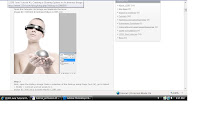
1. I began by opening the Futuristic Girl image and duplicating the layer.

next, I created the glowing ball effect by:
- opening a new document and filling it in w/ black.

then I Duplicated the background layer and renamed it ‘Effects’.
then chose Filter > Render > Lens Flare.
- I then picked the following settings; a 105mm Prime, set the brightness to 100 and positioned the flare in center of layer.
Next, went to Image > Adjustments > Color Balance and followed the settings as shown below.
I Duplicated the Effects layer, then went to Filter > Liquefy.
Picked the Twirl Clockwise tool to Create a twirl on the duplicated flare layer.
- Moving along, I Created another new blank layer and named it ‘Ray’.
Drew lines over the layer using the Brush Tool.
picked Filter > Liquify > Twirl Clockwise - Next, going to Filter > Blur > Radius Blur.
I Set the method to Zoom and quality to Good. - Then, shifted the Radius Blur Center near to the right side corner in the preview box
- Now, I chose an appropriate Brush and brush size from the brush palette
went to Filter >Liquify > Twirl Clockwise - Double clicked the Brush Layer to enter the Blending Options.
Adjusted the Outer Glow and settings as shown in the diagram below.
- When all is done, created a group folder and put all these layers into it before bringing it to the Futuristic Girl working space
but wait, not done yet!!!
- I Hid the Glowing ball Effects Group layer and worked on Layer 1 Copy (Futuristic Girl).
- Inverted the image by clicking Ctrl + I
- chose Difference for blending options of later group.
- Exclusion for duplicated woman layer.
- Erase tooled the rough, outer edges of the glowing ball effects group layer.

- okay, now i be Done!
http://www.123rf.com/blog/blog.php?idblog=b1000095

No comments:
Post a Comment