In this tutorial It shows how to give a plain flag the effect of motion (moving in the wind), here I'll use this Red rectangle as my flag
First Make a new layer
then select the Gradient tool
use White-Black gradient with Reflected Mode
Now make a small rectangular selection,
Illustrator Diamond Plate Pattern
began a new document in illustrator, color mode RGB.
- Selected the Ellipse Tool and then I clicked nmy curser on the art-board to bring up the Ellipse Tool dialog.
- then I created an ellipse 5px wide by 25px high and gave it a dark gray color.
- Then center aligned my ellipse onto my artboard.
making sure the ellipses is selected, I made a click on the artboard, once again, to bring up the Ellipse Tool dialog box.
- And then, again repeating the steps previously stated in this tut, I aligned it horizontally and vertically on the art-board. And only a slight alteration w/ making the ellipse smaller; 7px wide by 7px high, same dark gray.

- Added my two ellipses together by Option-clicking the Add to shape area button on the Pathfinder palette.

- Added a black stroke; weight of 0.625pt. Pulled up the Appearance palette and moved the black stroke behind the dark grey fill.
duplicated, the dark gray shape, and pasted it directly in front of the first shape.
- Then I changed the fill color of the new shape to a light gray and removed its black stroke.
- Offset the copy of new shape slightly to right.
w/ Object > Transform > Move (Shift + Command + M) - added the settinmgs Horizontal: 0.75px
Vertical: 0px - deleted the second copy of the light gray shape.
- Selected all of the shapes and grouped them together.
Rotated the grouped object by 45°.
Object > Transform > Rotate
Angle: 45° - Shift a copy of the newly the rotated object to the right.
Object > Transform > Move (Shift + Command + M)
Horizontal: 40px
Vertical: 0px
Make sure to click Copy instead of OK - Selected both objects and moved a copy of them down.
Object > Transform > Move (Shift + Command + M)
Horizontal: 0px
Vertical: 40px - Selected all four objects and then moved them once more.
Object > Transform > Move (Shift + Command + M)
Horizontal: 20px
Vertical: -20px - by selecting all four of the new objects, I made a reflection of them vertically.
Object > Transform > Reflect
Vertical: Selected
- Finally select all eight objects and then proceeded to drag-and-drop them into my Swatches palette to create a Swatch Pattern. Once you have the pattern as a swatch you can apply it as a fill or stroke to any shape object inside of Illustrator.


Done...
Illustrator Sunburst
- Using the Polygon Tool, I double clicked on the Polygon Tool and then entered the settings shown from the tutorial.doing this gives me an equilateral triangle.
- then, selecting the Rotation Tool, clicking at the top point of my triangle, allowing the triangle to now rotate around when using the Rotation Tool.
- I then filled the triangle w/ a light blue color.
i made a copy of my triangle using the shortcut ctrl+d.
I pressed ctrl+d, 6 more times to make 6 additional copies of my triangle, rotating each 45 degrees, to complete the sunburst look.


http://www.webdesign.org/web/vector-graphics/adobe-illustrator/illustrator-sunburst.13522.html
Live Trace in Illustrator
live trace a scanned image or other image file into a vector image w/ illustrator.
Open a New document. go to -File-Place- then navigate to the graphic to be traced, and that will become a vector.
2. Select the image, go to -Object-Live Trace-Tracing Options-.
Select -Trace- in the top right corner of the -Tracing Options- window, and dont forget to EXPAND the image after Trace.
And....presto-changeo, your graphic is now vectorised, and can be scaled without loosing quality.
http://www.webdesign.org/web/vector-graphics/adobe-illustrator/live-trace-in-illustrator.14292.html
Road Style
- 1. Created a new file.


- Selected the pen tool and make a stroke.
Opened the appearance palette by selecting Window/Appearance from the file menu. - In the stroke palette i changed the weight to 10pt.

- Dragged the 10pt stroke from the appearance palette to the Duplicated one Selected Item icon at the bottom of the palette.
- This created a copy of the 10pt stroke so that there are now two of them.
 Double clicked on the stroke tile and dragged the cursor to the white area to make the stroke on top.
 - Going back to my stroke palette, i changed the weight of the white stroke to 1pt. thus creating a white stripe through the middle of the black stroke.
- back on to the stroke palette, to check the dashed line box.
first dash box typed 6pt and pressed enter. 
- i then Clicked on the New Graphic Style button in the graphic styles palette and my road has now become part of the documented graphic styles.


it is saved for future use, in a very convenient location, the graphic styles tab.
Creating a HalfTone Effect in Illustrator
1. used the shape of a circle. If you want it around a specific shape you must copy the outline of that shape and repeat the same then increase the size of the same shape, with reversal of colors you can get different effect
2. then a second circle
3. center align the two
4. go to object >blend>options


7. play w/ choices, then ok
8. then go to object >expand appearance then live trace>photo high fidelity
9. expand
2. then a second circle
3. center align the two
4. go to object >blend>options

5.object >blend> make
6. effects >pixelate>color halftone
6. effects >pixelate>color halftone

7. play w/ choices, then ok
8. then go to object >expand appearance then live trace>photo high fidelity
9. expand

An Intro to Mesh Tool
Creating the Shape
1. Smart Guides and w/ ellipse tool and created a circle.
2. I Created the Mesh by Selecting the mesh tool and clicking exactly in the center of the circle.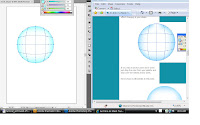
3. Division of the shaded areas Similarly click and divided the right side and the left side of the circle with clicking on the line running horizontally.
4. Switched tool to direct selection tool and selected all the nodes on the outer anchor points of the circle
5. Shaded w/ color palette and dragged it to a light blue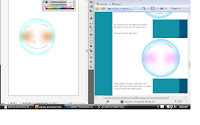
6. Selected the middle anchor points, and picked up a shade of pink.
7. Creating the face create and easily selected any anchor point and using its handles changed the direction of the color blending.
8. Using similar technique i drew now eyes.
1. Smart Guides and w/ ellipse tool and created a circle.

2. I Created the Mesh by Selecting the mesh tool and clicking exactly in the center of the circle.

3. Division of the shaded areas Similarly click and divided the right side and the left side of the circle with clicking on the line running horizontally.
4. Switched tool to direct selection tool and selected all the nodes on the outer anchor points of the circle
5. Shaded w/ color palette and dragged it to a light blue

6. Selected the middle anchor points, and picked up a shade of pink.
7. Creating the face create and easily selected any anchor point and using its handles changed the direction of the color blending.

8. Using similar technique i drew now eyes.
i think i will end this one. i love animation so much that i could go on forever w/ this!!!
pretty awesome! very informative. this was the first time i got to experience the mesh tool in this type of application.
http://www.webdesign.org/web/vector-graphics/adobe-illustrator/an-intro-to-mesh-tool.15830.html
http://www.webdesign.org/web/vector-graphics/adobe-illustrator/an-intro-to-mesh-tool.15830.html
Subscribe to:
Posts (Atom)
