Draplin vs.America

How to create a unique watercolor text effect

how to create in a simple cool watercolor text effect way.
The background.I began with opening a 600×400 canvas and filled it with a light brown color.
Then downloaded a metal texture, pasted it into the canvas, and desaturated it
changed the layer blend mode to overlay with opacity 90%.
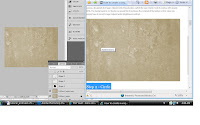
The Circle. I Used the Ellipse tool to draw a dark brown circle
Watercolor Brush Set. Nevermind I couldn’t get them to download!! Aarrghh!! Instead I used a brush w/ a medium/hard diam.
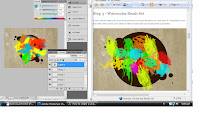
Text. Let’s add the text. I have used impact
The effect. Ctrl+clicked on the text layer to select its pixels. hid the layer and selected the one where I have painted with the brush.
Went to Select>Inverse and press canc. Thiis is where I got lost in this tut… what the heck is canc?

Anywho, onto the Path.. Hid the last layer created.
The path, the colored text, and the white text.
How to create the path: have to work on the first (white) text layer created.
Select the Horizontal type tool and right-clicked on the text>Created Work Path.
I hope that the final product should look something like this:

This tut was okay, a lot of ‘jargon’ though. Making it somewhat difficult to comprehend, for us newbee’s.
http://bestphotoshoptutorials.net/2009/06/04/how-to-create-a-unique-watercolor-text-effect/

Make an abstract wallpaper with photshop


how to make an abstract desktop wallpaper using photoshop
2. Open new photoshop document
3. Fill with black using Paint Bucket Tool
4. load the brushes
5. I selected the brush tool then went to the document and right clicked

6. which then allowed me to select a new brush tool of my choice
7. Putting a new layer (by clicking Ctrl+Shift+N) and selecting the white color as the foreground, I colored and painted with the brush in the work area.
8. I repeated the previous steps and tried-really hard- not to forget to set a new layer for each one.
o Little additions that I made to the brush strokes were:
1. changed Blending Options of layers
2. changed color overlay
3. added an outer Glow
o –Repeated this for each brush layer

this tut was really fun and I enjoyed messing w/ the different outcomes I could make.
http://ps-dimensions.blogspot.com/2009/06/make-abstract-wallpaper-with-photshop.html

add a romantic effect to a photo

1. first step is to choose your photo, I chose to use the tut’s photo example

next step is duplicate the background layer

Now go to channels select the blue channel then inverse it
after that select the RGB channel then go back to layer :

5. Now change the blend mode of the Background copy layer to overlay
wow-weee that was a cinch!!!i mean when compared to some of the others so far..!
final image
this tut allowed me to learn just how important those color channels really are. and ways in which i can manipulate them for a cool image effect.
http://ps-dimensions.blogspot.com/2009/06/romantic-photoeffect.html

How to Create the Tilt Shift Lens Effect in Photoshop

This tutorial shows how to reproduce the tilt-shift lens effect in Adobe Photoshop in order to create a miniature model effect.

I chose to use these photographs, one taken by a friend of mine, to try this out.
watch the video for more.


this tut made it easier to understand and use the blur effects.
http://www.picturesocial.com/video/how-to-create-the-tilt-shift

Creating a Glowing Sphere in An Inverted Image

in my opinion, to say the least, is that this particular tut was one of the more challenging tuts, thus far.
1. I began by opening the Futuristic Girl image and duplicating the layer.

next, I created the glowing ball effect by:
  1. opening a new document and filling it in w/ black.

  2. then I Duplicated the background layer and renamed it ‘Effects’.
    then chose Filter > Render > Lens Flare.
  3. I then picked the following settings; a 105mm Prime, set the brightness to 100 and positioned the flare in center of layer.
    Next, went to Image > Adjustments > Color Balance and followed the settings as shown below.
    I Duplicated the Effects layer, then went to Filter > Liquefy.
    Picked the Twirl Clockwise tool to Create a twirl on the duplicated flare layer.
  4. Moving along, I Created another new blank layer and named it ‘Ray’.
    Drew lines over the layer using the Brush Tool.
    picked Filter > Liquify > Twirl Clockwise
  5. Next, going to Filter > Blur > Radius Blur.
    I Set the method to Zoom and quality to Good.
  6. Then, shifted the Radius Blur Center near to the right side corner in the preview box
  7. Now, I chose an appropriate Brush and brush size from the brush palette
    went to Filter >Liquify > Twirl Clockwise
  8. Double clicked the Brush Layer to enter the Blending Options.
    Adjusted the Outer Glow and settings as shown in the diagram below.
  9. When all is done, created a group folder and put all these layers into it before bringing it to the Futuristic Girl working space

but wait, not done yet!!!

  1. I Hid the Glowing ball Effects Group layer and worked on Layer 1 Copy (Futuristic Girl).
  2. Inverted the image by clicking Ctrl + I
  3. chose Difference for blending options of later group.
  4. Exclusion for duplicated woman layer.
  5. Erase tooled the rough, outer edges of the glowing ball effects group layer.

  6. okay, now i be Done!


    http://www.123rf.com/blog/blog.php?idblog=b1000095

Creating a wood grain pattern Image

For this tutorial,
I created a new document.
Created a new layer and using the Rectangle Tool covered the entire document with black.
Making sure that my foreground colour was set to black and my background colour was set to white
I selected and clicked on “Filter”, “Render” and then selected “Fibers”.
entered the settings
with blending window open, chose “Gradient Overlay” from the left hand side menu and
entered these settings:
made a new layer above my current layer

Changed my foreground colour to brown and using the Rectangle Tool; filled the entire layer with the brown colour.
Then set the layer style to “Color”

And voala! The final product.
This tutorial helped by teaching me how to create my own texture
http://www.tutorialtab.net/?p=52
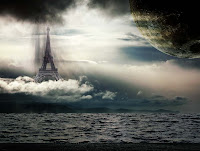
Creating a Surreal Floating Eiffel Tower Scene In Photoshop
For this tutorial, Design a Surreal Floating Eiffel Tower Scene In Photoshop, I had to first download images. Then with new document open, place first layer, and this is the image I started with.


1. I added a layer mask .


2. I added layer effects.


3. I copied/pasted selected image of tower onto the new layer.


4. again, copied/pasted selected image of moon onto new layer.
and finally, the completed image.

This tutorial was helpful in learning layers and combining images using several layers.

http://www.psdvault.com/photo-effect/design-a-surreal-floating-eiffel-tower-scene-in-photoshop/